We are a group of women (but men are welcome!) who have an interest in textile art and embroidery. We are of mixed abilities and there is no need for you to be able to sew to come and join us - there are no tests!
New members are always welcome - why not call in and join us as a guest for a few months?
Meeting fee for visitors is only £5.
Our meetings vary - we have talks and workshops, show and tell - we also have lots of weekend workshops and playdays. For details of what's coming up (and what's been and gone!) check out our programme below...

Saturday 3 December 2011

Olympic Postcards - TOGO!


As part of the Olympic celebration, every Branch of the Embroiderers' Guild was allocated (at random) a country to represent in post-card sized images, which will be displayed around the country during the Olympic Year.
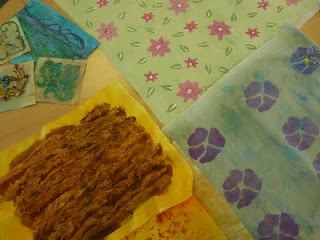
These are some of the varied Halifax submissions, with inspiration being taken from the flora, fauna, stamps and traditions of Togo.

The Ryedale Quilt


On 2nd December 2011 children who took part in the Ryedale Challenge and made a quilt which won first prize at Regional Day 2011 were invited to the Halifax Branch meeting and handed over the quilt to a representative from the Forget-me-Not Trust, Sheila Dryborough. The Forget-me-Not Trust is a charity which provides support to children with life-limiting illness and their families. They have just completed the construction of a brand new purpose-built children’s hospice in Huddersfield, and are planning to welcome children through their doors for the first time early in 2012. It is hoped that the quilt with its cheery floral theme will be displayed in one of the brightly painted public areas within the hospice. The Hospice relies heavily on public donation and some of the competition prize money was also handed over to Sheila to assist with the running of the hospice.
The photo shows some of the children who took part, handing the quilt over to Sheila.

Wednesday 19 October 2011

October Meeting - Gillian Travis

Our October meeting was a talk by Gillian Travis.
Gillian trained as a landscape architect - a fact which is well illustrated by the nature of many of her pieces.
After having her three children, she found that she missed the creativity of her work and started embroidery. This led to City & Guilds, a teaching course, and then becoming a tutor at Huddersfield College where she taught City & Guilds on a variety of textile-based courses.
She was also at one time, Chairman of the Halifax Branch of the Embroiderers' Guild. In 2006 Gillian was made redundant, and around this time her husband bought an old foundry on Elland Road in Ripponden which eventually became their home and both of their places of work, with Gillian opening a workshop where she now teaches her own classes.
Alongside the teaching, Gillian told us that she had always enjoyed travelling, and found a lot of inspiration for her own textile pieces from her travels, initially around Asia and then mainly around Europe, taking advantage of budget airline prices and cheap hotels.
Her work has focussed on subjects as diverse as the houses in Burano and Balkan socks, and she showed us many photographs illustrating where she found her inspiration and how she had interpreted this in her work.
Mainly working in painted fabric and machine embroidery, Gillian had also joined a contemporary quilt group where the members produce a piece of work every month, each year with a different format (this year being 10" square), which had helped her to produce a large body of work.
This in turn had led to her entering competitions both nationally and internationally, and winning many awards and prizes, including at the acclaimed Festival of Quilts at the NEC.
One of Gillian's more recent achievements had been publishing a book about her work and this contains many examples of her work and inspiration. Copies of her book are available by contacting Gillian at gilliantravis.co.uk where you will also find her excellent blog and details of her classes.


Sunday 7 August 2011

August Meeting - Stumpwork


The subject of our August 5th meeting was stumpwork, or as it should properly be called, "raised embroidery".
We looked at lots of examples in books and examined in close detail some pieces done by Sheila at Regional Summer School in 2010, in a class with Nicola Hilton. (They weren't finished on the day - Stumpwork is very time consuming!)
Members were then given the chance to have a go themselves, trying either a wrapped bead or a closed or open pea-pod, and we also talked about how to make leaves and petals.

Here are the wrapped beads - they are made from beads with large holes (available from Viking Loom and other outlets) which are then wrapped with a single strand of embroidery thread, using a beading needle or similar, otherwise it won't go through the hole towards the end of the wrapping. To finish, a small bead of the same colour is attached, and the berries are attached to the fabric with a shank (like a button) so that they can "dangle".

To make the open peapod, lay a strip of beads and couch them down so they don't wobble around.
Lay stitches of 6-strand embroidery thread alongside the peas to pad out the pod, then do blanket stitch over the strands, very close together, so that it covers the padding. (There might be a different name for this stitch but that's the gist of it!) Fill in any gaps with satin stitch to give a smooth finish.
To make the closed pea-pod, draw your outline onto our fabric faintly with pencil. Fill in vertically with 6-strandded cotton, as before, and then use single strands to do blanket stitch and satin stitch to cover the padding.

The flat leaves on the fabric are made by drawing the outline on the fabric, and doing long and short stitch from the centre of the leaf to the outside. Finish by stitching a vein down the middle of the leaf.

The raised leaves are made on a separate piece of fabric.

First, a piece of fine paper-wrapped florists' wire is formed into the shape of a leaf (or petal) and this is then couched down onto fabric in a hoop, with a few stitches.
Then, very close blanket stitch is done with one strand all around the outline of the leaf, with the smooth edge of the stitch on the outside. Make the stitches very close together, to hide the wire You will find that this looks better when finished, if the wire is the same colour as the thread! You can always colour it in with paint or felt pen before stitching, if you can't find a match. Make sure that you wrap the thread round the wire where the two edges meet and it becomes the stem.
Run a thread through the blanket stitches on the inside of the wired shape which gives an anchor for your filling in stitches, then fill in the centre of the leaf with long and short stitches to the centre, as before, and finish with a line of stitching for the vein.
The final, scary part, is to cut your leaf out of the fabric, cutting as close as you dare to the stitching. If you find that you have white fabric left showing round the edge, trim with VERY sharp scissors and as a last resort, it's back to the felt pen (but that's cheating!)
Attach it to your picture by poking the bare wire stem through the fabric (you may have to make tiny holes with a needle or scissor point) and secure on the reverse with small neat stitches.

And here is a finished article, with detached leaves and petals and wrapped beads.

Books which are dedicated to the subject usually give good step-by-step instructions and many of the same methods are used for other items - for example, the dragon fly above has wings made in the same way as the leaves, but with a different fabric for the wings, and has a wrapped bead for the abdomen.
Why not browse the new Embroiderers' Guild Bookshop, run by Search Press, at www.egbookshop.com?

Friday 13 May 2011

May Meeting - Dry Felting

Armed with felting needles, sponges and merino tops, we set about creating our dry felted masterpieces with varying degrees of success! Most of us worked on a floral theme however some members were more ambitious and started some 3D animals - looking forward to seeing what everyone made of their fleece at the next meeting! No photos of this evening so you'll have to use your imagination. (May be for the best!)

Monday 11 April 2011

April Workshop - "5 Hour Challenge"!

This workshop, run again by our Chairman Wyn Ingham, was a mystery to all of us prior to the day. Wyn provided us with a list of ingredients and we just turned up and did as we were told (except for Sandra who was a bit of a rebel).
Every hour, Wyn told us what we had to achieve in the following hour, however as the idea had come from a magazine where this was a 5 day challenge, we were understandably lagging behind by the end of the day!

Hour 1 - was spent colouring a piece of plain fabric (calico or similar) with watered down acrylics, fabric paint or dye. While that was drying (with the help of hair-dryers, heat guns and the hand-dryers in the toilets) we cut shapes from foam to make some stamp pads. Wyn had bought a bargain foam bed roll at the pound shop which worked a treat and was much cheaper than the proprietory art brands! We made the pads by sticking them onto thick card with double-sided tape.

Hour 2 - was spent stamping patterns onto the fabric we had coloured, using the pads we had made (Wyn let us cheat and use some ready-made stamps too).

Click on a photograph to see the enlarged version

We also used some puff paint, or Expandaprint, to accent parts of our pieces.

You can see from these pictures that, as usual, there were lots of very different ideas within the group.

Hour 3 - was spent machine stitching on our stamped pieces of fabric. The accuracy of this stitching was not so important, as the next stage was
Hour 4 - no-one actually reached this stage, but the idea was to cut our fabric into pieces and then
Hour 5 - reassemble the fabric into a vessel, any shape or size.
Anyway, the following pictures show most of our pieces at stage 3, after being machine stitched:

Davina's piece after stitching
Another piece by Davina. The white areas are printed in puff paint, then embellished with stitch.
Some of Sandra's experimental pieces, incorporating wool fibres.
Vi's piece which almost looks like a finished quilt!
Maureen's piece with some applied fibres and loopy machine embroidery
Jan's piece, based on allium heads, with painted Bondaweb applied in strips
Wyn's samples, based on peacocks and peacock feathers
Helen's piece stamped with intricate butterflies
Myra's pansies, showing several stages of the process
Cath's interesting abstract piece - can't wait to see where this is going!
Val's vibrant sunflowers
Sheila's pansies which have been outlined with fabric paint for further emphasis
Mandy's piece, part printed and part stencilled (and part stitched!)

Hopefully we will see some further development by the time of the May meeting...in any case, if you are not going on holiday (which seemed to be most people!) please bring your pieces for the benefit of members who didn't attend the workshop.

April Meeting - Mary Conway - "Thoughts on Paper"

Several new members and some welcome old faces joined us for tonight's meeting. Before Mary began her talk, she kindly judged our 2011 Branch Challenge, which was based on the same categories as the Regional Competitions (got to get those entries in there somehow!). The categories were, "Chemistry", "A Confection", and "A Flower Beginning with the Letter A". There were lots of entries, displaying all manner of skills and ideas.

In second place, Mary chose Cath Moore's thought provoking piece on the way that a flawed DNA gene can affect a family's health, in the "Chemistry" category.

In first place (drum roll...) Mary chose Val Turner's beautifully machine stitched (at arm's length?) piece in the "Confection" category. You can tell from these two examples that the standard of work was extremely high and we are hopeful of coming home with some trophies at Regional Day!

Mary's talk detailed her work with paper, starting with her early days of making concertinas from bus tickets, and I suspect that she was not the only one!
Mary's samples were very delicate and intricate and she told us that she often worked with tracing paper in order to get a knife-sharp crease.

One of her major pieces was based on Roger Akroyd's library at Bankfield Museum and included her making a translucent smoking jacket out of organdy based on one of Roger's jackets, this was then laid on photo-sensitive paper and the resulting photos reassembled into a picture of the jacket.

As you can see from the above piece, there is a heavy Japanese influence to some of Mary's work, which involves very accurate paper-folding.
She is currently working on a project detailing how climate change is predicted to affect the coastlines of some countries, due to the rise in sea levels.

Saturday 5 March 2011

March 4th Meeting - Val Hughes

Another lovely social evening and a lovely new (young!) member. After admiring Val Turner's new "scaffolding" we got down to business. The Regional Committee had sent details of this year's Summer School at Bishop Burton - three great tutors and three days' peace and quiet for stitching, all for £200. Members were encouraged to complete their Challenge pieces in time for judging by our guest speaker Mary Conway at the next meeting, when we have prizes for the top pieces. Cath and Helen, both doing "Chemistry", brought their pieces to show us and make us envious! We sent our love and best wishes to Linda Saltmarshe, who has been in hospital for a few weeks and is now recovering at home.

We finally let our guest speaker, Val Hughes, get a word in edgeways. She told us how refreshing it was to be working locally (Val lives in Luddendenfoot, although she admits that she will always be an Essex girl at heart) - although her "day job" is also in Halifax, working as a tutor at Calderdale College.
Val's talk was on her "Anne Boleyn" series of costumes, ten pieces of wearable art which she completed for her degree at Bradford College, inspired by the turbulent life (and death) of Anne Boleyn after she met Henry VIII.

Pieces depicting Anne's incarceration and execution

The dresses, with titles such as Incarceration, Iniquity, and Charade, gave an insight into the forces at play which affected the life and destiny of this enigmatic woman. Mainly using hand-made felt, machine embroidery and fabric manipulation, and a limited palette of red and black, the pieces were so complex that we weren't surprised to learn that Val had often had to stay up until 2am in order to complete her series of work in time to graduate!
The Royal Court - a nest of vipers...

Wired pieces showing Anne's entanglement

An admiring Myra!

Sunday 13 February 2011

"Ryedale Challenge" Young Persons' Workshop


On 5th February we held a workshop for Young Embroiderers who wanted to take part in the "Ryedale Challenge". Members from Ryedale had provided each of the 17 branches in the region with a bag of assorted fabrics, threads, buttons and beads, with the proviso that they be used by young people, with the results being entered into a competition to be judged at Regional Day 2011.
We decided that we would produce an art quilt which would later be presented to the new Forget-me-Not Childrens' Hospice being built in Kirklees, so with that in mind, we decided to make the theme floral.
On the day we had seven willing volunteers, who worked really hard to produce lots of colourful flowers and at the end of the day they left with more flowers to decorate to fill in the background that Cath Moore had worked hard on during the previous week, dyeing fabrics to make fields and sky.

Working together stitching their decorated flowers onto the background


Piecing the strip quilt and embellishing the "corn field"