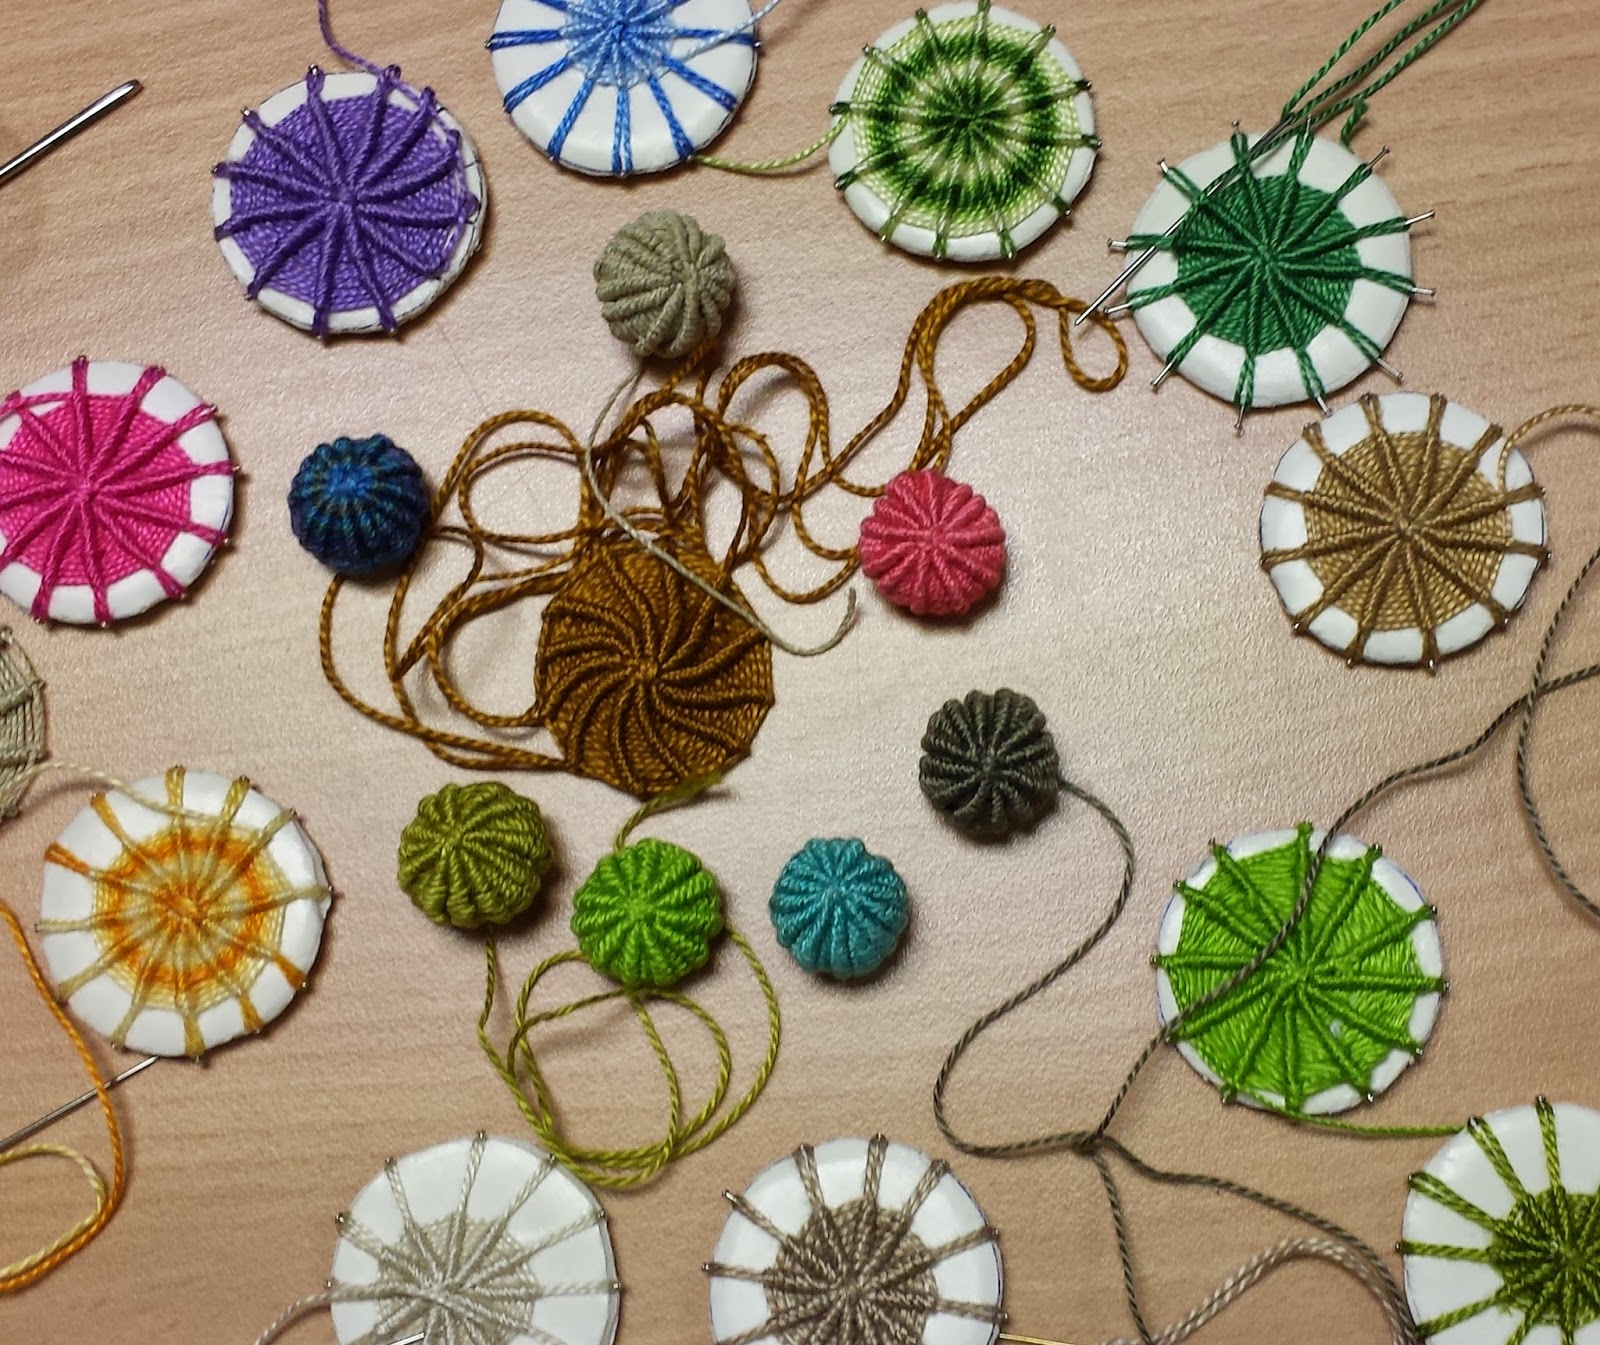
I hope that you will be able to work out, from the pictures below and the instructions which Wyn has written, how to make them for yourself.
You will need:
A 3cm (or thereabouts) circle of thick card or foam core board marked with dots around the perimeter as if it was a clock with twelve numbers
4metres/4.5 yards of cotton Perle No 5
A tapestry needle
A small piece of sticky tape
12 pins.
Put your pins in the edge of the card circle, one for each of your twelve dots. Don't push them fully in just yet. Make a needle hole in the centre of the circle and bring your needle and thread through from the back, leaving a 7.5cm/3inch tail at the back. Coil this up and cover it with the tape out of the way so that it doesn't tangle later.
Wrap your thread from the centre around the pin which would be at 12 on a clock face, and then travel down to 6, wrap around 6 and then travel up to 11, around 11 and then down to 5, around 5 and then up to 10 etc until all pins have been included. It may look a bit messy, but the next stage tidies it up.
Go back to the centre of your "clock" and go under the intersection of as many threads as you can, do this twice or three times and pull your thread tight. You will now have a tidier looking set of spokes.
Push all your pins in as far as possible.
Now the thread wrapping starts. Wherever your thread is, go clockwise over the top of the next thread, then go anticlockwise under the same thread and its anticlockwise neighbour.
Repeat until the whole of the circle has been covered.
Always clockwise over one, anticlockwise under two.
You are doing a Spider's web stitch. (See below illustration).
It takes two or three full rotations to see the pattern emerge. Points to watch out for - occasionally let your work hang from the thread and needle to remove the twist that you will be inadvertently putting in your thread, this avoids many tangles.
"Tamp" down your stitching occasionally to compact it towards the central hub.
When you reach the outside edge, remove the nearest pin to your thread and go through the tiny loop. Work your way around the edge, removing a pin at a time.
Remove the tape and release the central thread.
Remove the embroidery from the reusable card.
Carefully "draw up" the thread and gather the circle just enough to be cup shaped and stuff with a little wadding.
When you feel it is fat enough, draw up completely and do some tiny stitches to seal the gathering.
Hey Presto - a Yorkshire Button. You can leave them spherical or gently squash them and make them more mandarin orange shape. You could also try putting a largish bead in the centre for a harder button.
You could also try it on a much larger scale using the cardboard/polystyrene tray from under a pizza, and torn sari fabric. If you draw up the edge and go through each of the loops at the end, you will have a 3D fabric bowl.
Here is a great photo of a set of buttons that Vanessa has completed since the meeting, she also found some complementary background fabric which contained some spider's web stitch :
And here are tow buttons completed by Abi :


Thank you so much for your instructions.
ReplyDeleteAlways on the look out for portable projects.
Great to see you folk in Halifax.
Best wishes